Jockey Box Maintenance Essentials
Ensure your Jockey Box Lasts
When you think of summer you may think of warm weather, days at the beach, or hanging out in the park. For those in the beer industry, the summer season means the high season is upon us. We look forward to a plethora of releases (likely another IPA), busy days at the Tap Room, and most of all: events and festivals. And what better way to serve beer at a festival than… from a jockey box!
While gatherings have been put on hold in the past couple years, this summer events are ramping back up, hopefully bringing us back to the business levels seen in the “before times.” It is important to prepare for this busy season by ensuring that your event equipment is functioning at its best, allowing your beer to stand out from the crowd.
Arriving at a festival ready to serve and discovering your refrigeration system has failed means potential losses in event income, product, staffing, and travel costs… not to mention that patrons will not get to taste that incredible new IPA! Even a slight inefficiency in your system could be the difference between pouring crisp, cold samples… and pouring out pints of foam.
To ensure that you are prepared to showcase your beer this summer season, check out our tips on how to properly clean, maintain, and trouble shoot your jockey box this summer.
Jockey Box Basics
What is a Jockey Box?
While I know you’re no slouch, let’s quickly get back to basics… what is a jockey box, and why do you need one for your event? If you’re a seasoned pro and just looking for maintenance tips, head on down to the next section!
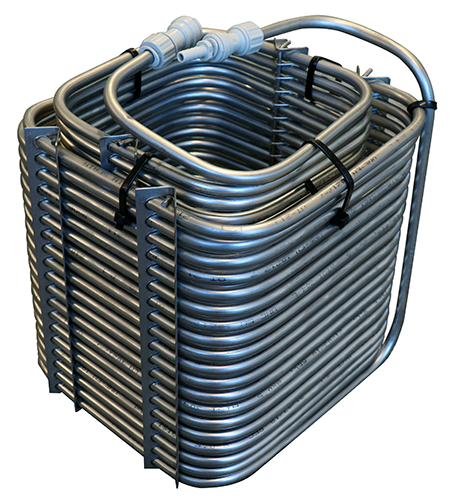
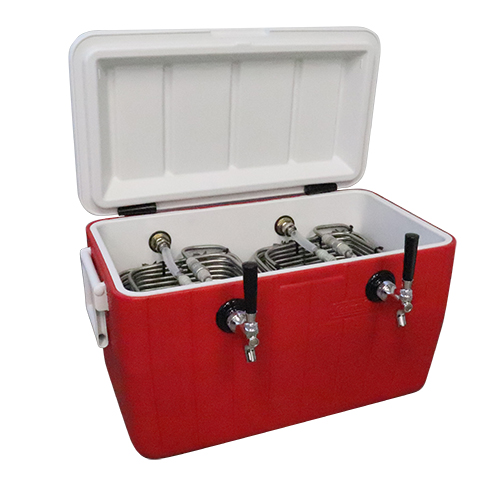
A jockey box beer dispensing system is a portable system designed to dispense cold beer, and other beverages, without the need for electricity—a must have at any outdoor event or festival. Anyone who has ever had to pour samples or cups from bottles, or had to deal with empties, can attest to the superiority of keg and BIB dispense. This portable system’s primary components typically include a cooler, regulator, keg couplers, external gas and beer jumper tubing, a stainless-steel cooling coil (sometimes cast in an aluminum cold plate,) and a faucet.
.jpg)
The cooler is filled with ice and water, which cools the Cooling element. The beer is then forced through the coil using carbon dioxide (CO2) pressure. As the beer travels through the cooling coil, it is cooled down to the desired temperature and is ready to be dispensed through the faucet.
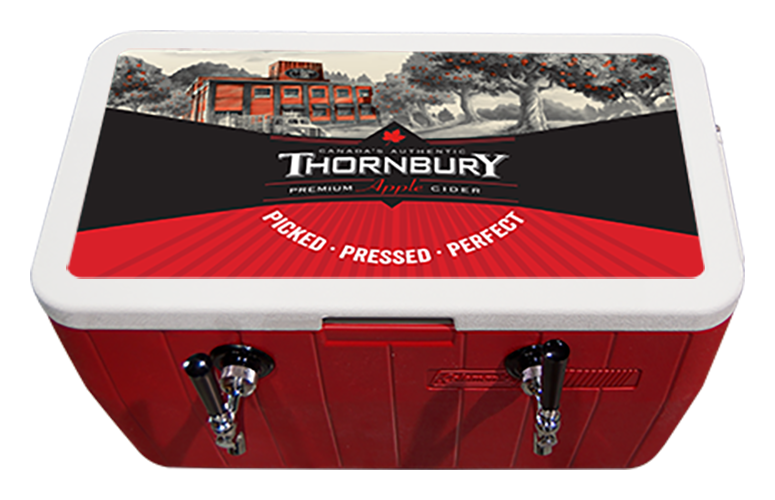
The jockey box system is especially popular at outdoor events, as it allows beer to be served without the need for bulky refrigeration units or electricity. Not only is the system easy to use, but it can also be branded with custom designs (LINK TO BRANDED PAGE), allowing you to stand out from the crowd… literally. Couple these features with being relatively easy to set up and use, a Jockey Box System is a convenient option for anyone who wants to serve beer on tap quickly and without hassle.
Understanding the Components of a Jockey Box
Everything in your Jockey Box that touches the beer requires regular specialized cleaning. These are the keg coupler, keg jumper line(s,) cooling coil, and faucet. If these are neglected off flavours, excessive foamy waste, and mild to moderate food borne illness can occur.
Everything else requires basic cleaning and maintenance for mechanical function, good insulation, and a long service life. This includes the gas regulator and gas line(s,) cooler, faucet handle(s) and your tool kit.
How to Clean & Maintain your Jockey Box
Steps to Clean your Jockey Box
At last… on to the good stuff. Now that you’ve got a handle on the basics of the jockey box and its components, let’s dig into the steps you will need to take for proper maintenance. Read on for a step-by-step guide on how to clean a jockey box:
-
1. Disconnect any empty or partial kegs.
2. Drain the cooler of any remaining ice or water.
3. Prepare your solution of beverage line cleaner and clean, potable water. Your water should never exceed 40°c /104°f. (If you were taught to use hot water, please pay careful attention to the upcoming explanation on water temperatures.)
4. Connect your cleaning pump or your cleaning can/bottle in the appropriate manner, for the method of cleaning you prefer.
5. Flush any remaining beer (or other beverage) from the lines with clean, potable water.
6. Fill the lines and coils with an appropriate cleaning solution and recirculate or soak for 10-15 minutes.
7. During the soak/recirculation period, disassemble and scrub out faucets. Ensure weep/burp holes are cleared of any obstructions.
8. Replace any worn washers or seals in the faucet.
9. Once recirculation or soak is complete, flush lines with clean, potable water until clean. If water remains discoloured, or continues producing sediment, repeat steps 5 to 8 until rinse is clean and clear.
10. Turn off gas. Remove, soak and clean the exterior of your keg coupler(s.) Clean exterior of gas regulator, gas hose(s,) gas manifold(s) (if applicable,) and beer jumper tubes.
11. Lift or remove the cooling coil as needed to clean the interior of the cooler, as well as the coil, with dish soap and lukewarm water.
12. Replace any damaged seals or fittings and reinstall the cooling coil.
13. Reinstall faucets and couplers. Blow lines dry. Cap or wrap faucets and couplers with purpose made caps, plastic bags, or plastic wrap, to keep them clean between events.
And voila! Your jockey box is clean and ready for storage. Now, you might be asking “How often is cleaning my jockey box really necessary?”
Frequency of Cleaning
How frequently you clean your jockey box will depend on several factors. How often is the unit being used? What type of beer, or other product, is being dispensed? What are the conditions in which it is being used? What materials are your components made from? Depending on the answers to these questions, you can begin to form your cleaning schedule.
All Cleaning
DON’T USE WATER THAT IS TOO HOT!!!!
Many technicians and brewers were taught to use extremely hot water for flushing, cleaning and sanitizing. THIS IS DISASTROUS FOR THE PLASTIC TUBES!
Most tube pressure ratings are based on a temperature of 20°c, or about 70°, and list a max temperature allowance of around 50°c or 120°f. Most cleaning solutions for beverage systems are comprised of sodium hydroxide [lye] and a sanitizing agent. These compounds mix well with water of any temperature, but the highest recommended temperature for any cleaning solution is about 40°c/104°f. Exceeding this temp can permanently damage your plastic tubing, unless it is specifically designed for high temp use.
It is also important to only use cleaners designed for beverage equipment use, and if possible, avoid the use of chlorine and chlorine bleach [sodium hypochlorite] based cleaners. While liquid bleach is an effective sanitizer and cleaning agent when used correctly, it is less than Ideal for beverage equipment. It is difficult to rinse, can break down many of the plastics we use, and can be harmful to stainless steel, if not rinsed correctly.
Daily Cleaning
If the jockey box is being used at a busy or multi-day event with high traffic—or you are using it in a more permanent location, such as your tap/tasting room—it should be flushed with clean water after each use and then blown dry. Due to the periods in which the box will sit without ice, and because product often enters the box at warmer temperatures, product should not be left in the lines between uses and faucets and couplers should be wrapped/capped to prevent new contamination.
Weekly Cleaning
If the jockey box is being used at a location where there is less risk of contamination, such as a patio, event space, concession stand, or other permanent or semi-permanent facility, the unit should be cleaned weekly, at the end of the slowest service of the week. The lower the volume of beer that passes through the equipment between cleanings, the more important it is to clean the equipment on time. The longer beer sits still in the lines, the more time it has for sediments, proteins, sugars and yeast to adhere to the interior of the tubes and begin propagation of bacterial and fungal colonies.
Event Based Cleaning
If the jockey box is not used frequently or is used only sporadically at events, it should be flushed every day after last call, cleaned at the end of each event, as well as at least once per week. It should also be cleaned prior to storage over a week, and after coming out of storage of more than 1 month. If a box is stored without being cleaned, or is left with lots of rinse water inside, the risk of runaway yeast or bacteria is of great concern, as is a risk of damage to components.
Further, depending on the product served, periodic demineralization or acid cleanings should be performed to prevent buildup of mineral stone such as calcium oxalate [beer stone], potassium bitartrates, or potassium hydrogen tartrates [wine stone]. These mineral deposits not only create rough surfaces for bacteria and sediment to collect, they also degrade metals as they are formed of ultra-hard crystals of high or low PH. Even stainless steel will eventually succumb to these powerful mineral deposits. Depending on the products served, demineralization should be performed every 3-12 months, or as part of long term/seasonal storage preparation.
Additional Maintenance
At this point, you’re well on your way to a pristine jockey box. However, your job doesn’t end here. In addition to regular cleaning, there are several steps you can take to maintain your jockey box in the best condition possible and reduce product waste while it is in use.
Proper Storage
When not in use, store the jockey box in a cool and dry place. Before putting the jockey box into storage, ensure that its components have been able to fully dry. This will guard against potential mold or bacterial growth between uses and help preserve the lifespan of the jockey box. Additionally, ensure that you are storing your jockey box away from the elements, preventing it from succumbing to sun or water damage, for example. Detach and either wrap or bag faucets and couplers. Remove and carefully roll up external tubes. Store in a sealed plastic bag or cap/wrap tube ends.
Check for Leaks
Before each use, check for any leaks in the system. If you are able, pressurize the entire system with CO2, beer gas, or nitrogen only, before introducing product. You can use an empty keg or cleaning can to fill the lines with around 30 psi of compressed gas. Let the system rest under pressure for 5 minutes.
Next, keep one eye on the tank pressure gauge, which is the higher-pressure-gauge. While watching that gauge, turn off the main valve on the CO2 cylinder/bottle, but leave the regulator valve open. If there is a leak in the system, the tank pressure gauge will begin to lose pressure the moment the tank is off. Often, you can find the leak by listening and wiggling lines at connection points. If this doesn’t work, fill a spray bottle with warm water, and about 1 oz of dishwashing detergent. Turn the gas bottle back on and spray all the connection points with the soapy water. Bubbles will begin to form at any leak point, though they might be very small and take a minute or two to build.
Inspect the Lines
Inspect the hoses regularly for any wear or tear. Replace any hoses that show signs of damage, to prevent potential leaks.
Troubleshooting your Jockey Box
While a jockey box is a relatively simple beer dispense system, its maintenance can be complex. If you will be participating in beer events or festivals this summer season, ensure you are prepared to care for your jockey box. If you experience performance issues, the culprits will usually be one or more of the following, in the order presented:
Use Proper Gas and Pressure
The appropriate gas and gas pressure for a Jockey Box has more to do with the box, and the serving temperature of the keg, than the beer itself. Chill plates average 12-15 psi restriction value, and coils will vary by length and tube diameter. The warmer a keg is, the less likely it is that you will over-carbonate it. If the kegs are colder, shorter cooling coils are required, as CO2 is not as readily absorbed as the product gets warmer. One of the best tools available is the McDantim Easyblend® app, via Android or Apple. It can help you find the ideal pressure for your beer through a range of temperatures, as well as how to adjust pressures to account for blended gasses.
Blended gas cylinders are sometimes used to prevent over-carbonation, or when serving nitrogenous beers like Guinness, Young’s Double Chocolate Stout, or Old Speckled Hen, but is rarely needed at events. Most people use pure CO2. Just ensure you are getting CO2 in a food grade cylinder. The main difference between gasses used for Industrial, food or medical purposes, in most markets, is the material and cleanliness of the cylinder. Rusty and oily residues are not traditional beer ingredients.
Generally speaking, cold plates and 50 ft Coils require 12-16 PSI. Intermediate coils run best at 23-26 psi, and 120 ft Coils run 30-36psi.
Temperature
The best bet is to get as much ice in your cooler as you possibly can, and then add water, until the top coil is just covered with the water. Chances are, the ice will melt and settle in. Don’t worry if a bit of the ice is still above the water. As you pour beer, ice will continue to melt. As ice melts, just add additional ice and drain water as needed. Try to keep the water level above the coil top, but below the shanks.
Try to keep the kegs iced, or under an insulated blanket. Remember that the keg draws beer up a tube, from the bottom. Try to keep the bottom of the keg in ice water, or at least, off the floor or ground (unless covered in snow or ice,) and away from heat and sunlight. If the kegs are warm or hot, add salt to your Jockey Box to increase thermal conductivity between the water, the ice, and the coils. Don’t do this if the kegs are on ice, as the beer might freeze in the coil.
Train your team members on proper use and maintenance. Remind them that a quality Jockey Box is not indestructible, and that if it malfunctions from neglect and abuse, they will be the ones suffering the consequences at the next event. Encourage them to learn about beer and the brewing process and empower them to take pride in and ownership of their role in serving your product.
Create a culture of ambassadorship within your event, your local beer community, and your serving teams. You will find that your contemporaries and competitors are often some of your best customers and advertisers, if they are treated as friends. Not only will you ensure your beer is reaching customers’ hands in the best possible condition, but your customers will also recognize a team member who is excited to serve your beer—and be sure to come back for your beer again and again.